目次 今回はWordPressのサイドバーウェジットの設定について、 簡単に書いて行きます。 functions.phpに下記のようなコードを追加します。 必要に応じて書き換えてください。 すると、 WordPress管理画面の「外観」→「ウィジェット」に サイドバーが作られます。 ↑画像のような感じで追加されます。 表示されない場合 たいていの場合小さなミスが原因です。 例えば・・・ ・スペルが違う ・末尾のカンマが抜けている ・シングルクォーテーションで囲んでいない ・id=> の所に大文字を使っている 等がよくあります。 画像のようにアイテムを設置していきます。 表示方法 出したいページのphpファイルに直接、 dynamic_sidebar( 'idに設定した文字' ); で出力します。 簡単にサイドバーを作れるので、WordPressは便利ですね('ω')ノfunctions.phpに記述
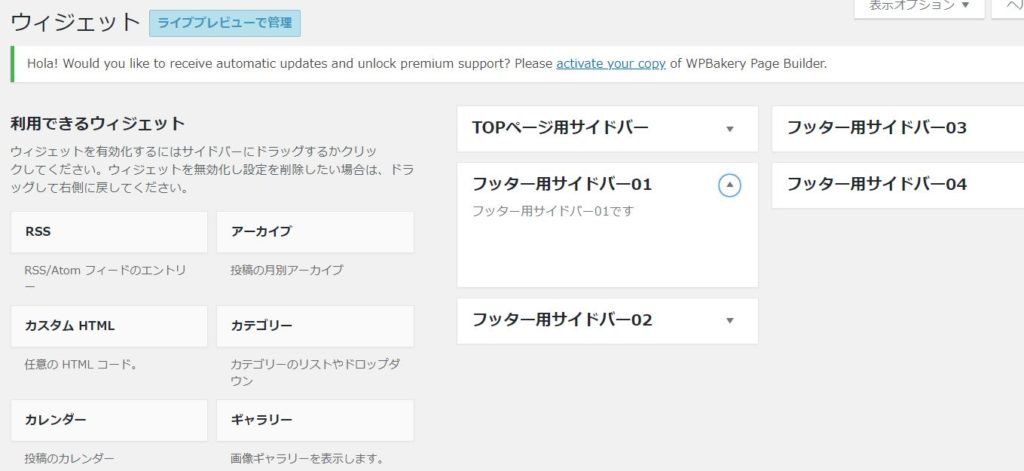
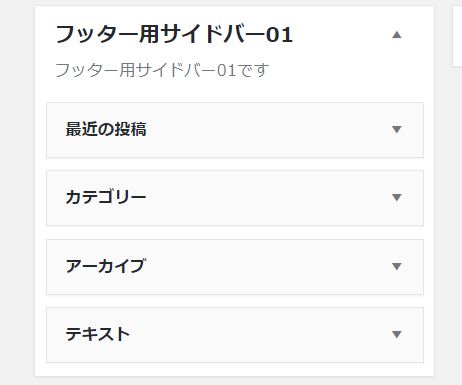
サイドバーにアイテム設置
表示
私達は京都でNo1のデザイン力・UI力を目指す
システム開発・Web開発カンパニー
株式会社なないろです。
各種CMS、企業サイト、キャンペーンサイト、顧客管理システム、IoTシステムなど幅広いITソリューションを優良なデザインとUIで、SEOソリューションをあわせてお客様の目標達成を行う企業です。
Laboratory
なないろ研究所
⼈と⼈をつなぐコミュニケーションをもっと世の中に。
それが私達が⾏うこと。
なないろ研究所では日々、様々なことをリサーチし、実験しています。
コミュニケーションの流通をお手伝いするために、日々様々なリサーチを行い、分析し、時に実験しております。
そんな日々の活動内容においてログをつけております。
このような情報共有が、我々が考えるコミュニケーションの一つの形です。
2018.11.22